Sunday, July 20, 2014

A Book in Review: Persuasion

Might I persuade you to read 'Persuasion', if you haven't already?

'Persuasion' concludes my reading of all Jane Austen Novels. Out of her 6 completed works, I read four within the last month. The first of Austen's novels that I ever read was 'Mansfield Park', my junior year of college. I had already loved the movie and the Hugh Grant version of 'Sense and Sensibility'. So, when I went to read 'Mansfield Park', I was hoping to enjoy it and did.

I have found each novel to be very good and gives me hope for love, in my own life... especially 'Persuasion', as Anne is considerably older than the rest of Jane Austen's ladies... which places her a year younger than I am currently myself. Ha!

I hope that what I write is making sense, because it is currently 1:18 am and I am extremely tired and I do not know what keeps me from sleep.

Anyway... read the rest at your own risk. Though a simple review, it may be the most spoiler filled!


Anne, so sweet, kind, caring, and gentle... easily overlooked by her father and older sister Elizabeth. Her sister Mary only wanting her around, for her own sake. Anne, so devoted to Lady Russell that she was easily persuaded against Captain Wentworth. Ahh!

With age comes understanding of yourself and those around you.

Paths are crossed and intertwined and an unyielding love on both Anne and Wentworth's side was exposed and re-kindled. Wentworth loving everything kind, caring, sweet, and gentle about Anne, not overlooking a single thing about her.

I loved this novel and I recommend it to everyone!

I give this novel 5 out of 5 stars.

P.S.- Don't you just love this cover?!

Wednesday, July 16, 2014

Homemade Taco Seasoning

In an effort to get rid of some of the chemicals I eat, I have started to make my own taco seasoning. The recipe I am going to share with you, is a combination of two that I found on Pinterest. I made a batch for my mom, for Mother's Day. She loves it! I made some for myself as well. It is spicy. Just the way I like it! However, you shouldn't worry, it isn't too hot.


Taco Seasoning

4 Tablespoons chili powder
3 Tablespoons + 1 teaspoon paprika
3 Tablespoons cumin
1 Tablespoon + 2 teaspoons onion powder
1 teaspoon garlic powder
1/2 teaspoon cayenne
3 teaspoons sea salt
3 teaspoons black pepper
1/2 teaspoon red pepper flakes

Combine all ingredients and put them in a cute jar or container. Use two heaping tablespoonfuls and 3/4 cup water per pound of cooked and drained ground beef. I imagine that this will work just as well for chicken, but I have yet to try it.

Tuesday, July 15, 2014

Easy Peasy Quilt Tutorial

I am a quilter... or rather I make blankets, because I don't actually do the quilt top. I don't have the money to buy one of those machines, nor do I have the money to pay someone to do it for me. But, if you will, please go along with me, I am a quilter.

I have made many a quilt in my nearly 30 years of life and I am always so excited to give them away. People enjoy receiving quilts, but I think that they would enjoy them a lot more if they truly understood all of the work that goes into making one.  I mean cutting the pieces! Piecing the top! Oh, The ironing! Ahh!

I typically make this quilt in one day, from cutting, to wrapping it up in gift paper. However, this time around, I allowed myself to cut on one day, sew the top on another day, and then I put all of the layers together on a third and final day. I have made this particular quilt many times for babies and military personnel.

Once you give this quilt a try, it will be your go to quick quilt. My mom got this quilt from a magazine, back when I was in high school, so at least 15 years ago. She used it to make me a Veggie Tales quilt. It is still one of my favorites!

I was at JoAnn's Fabric for something completely different, when I saw the zig-zag and bird material and knew that they would be the perfect combinations, for the quilt I wanted to make for my best friend's baby (due in early September!). They other colors were easy to pair as well.

The completed quilt.


A close-up of the materials used.

Generally, something ends up wonky in my quilts, but for the first time ever, the squares all lined up! This made me extremely happy!

If you would like to make this quilt yourself, here is what you will need:

2 patterned fabrics- 5/8 yard for each fabric
2 plain fabrics- 5/8 yard for each fabric
1- 3/4 yard fabric for backing (45 inches wide, if you can)
Batting (a little bigger than finished size)
Thread that matches fabric

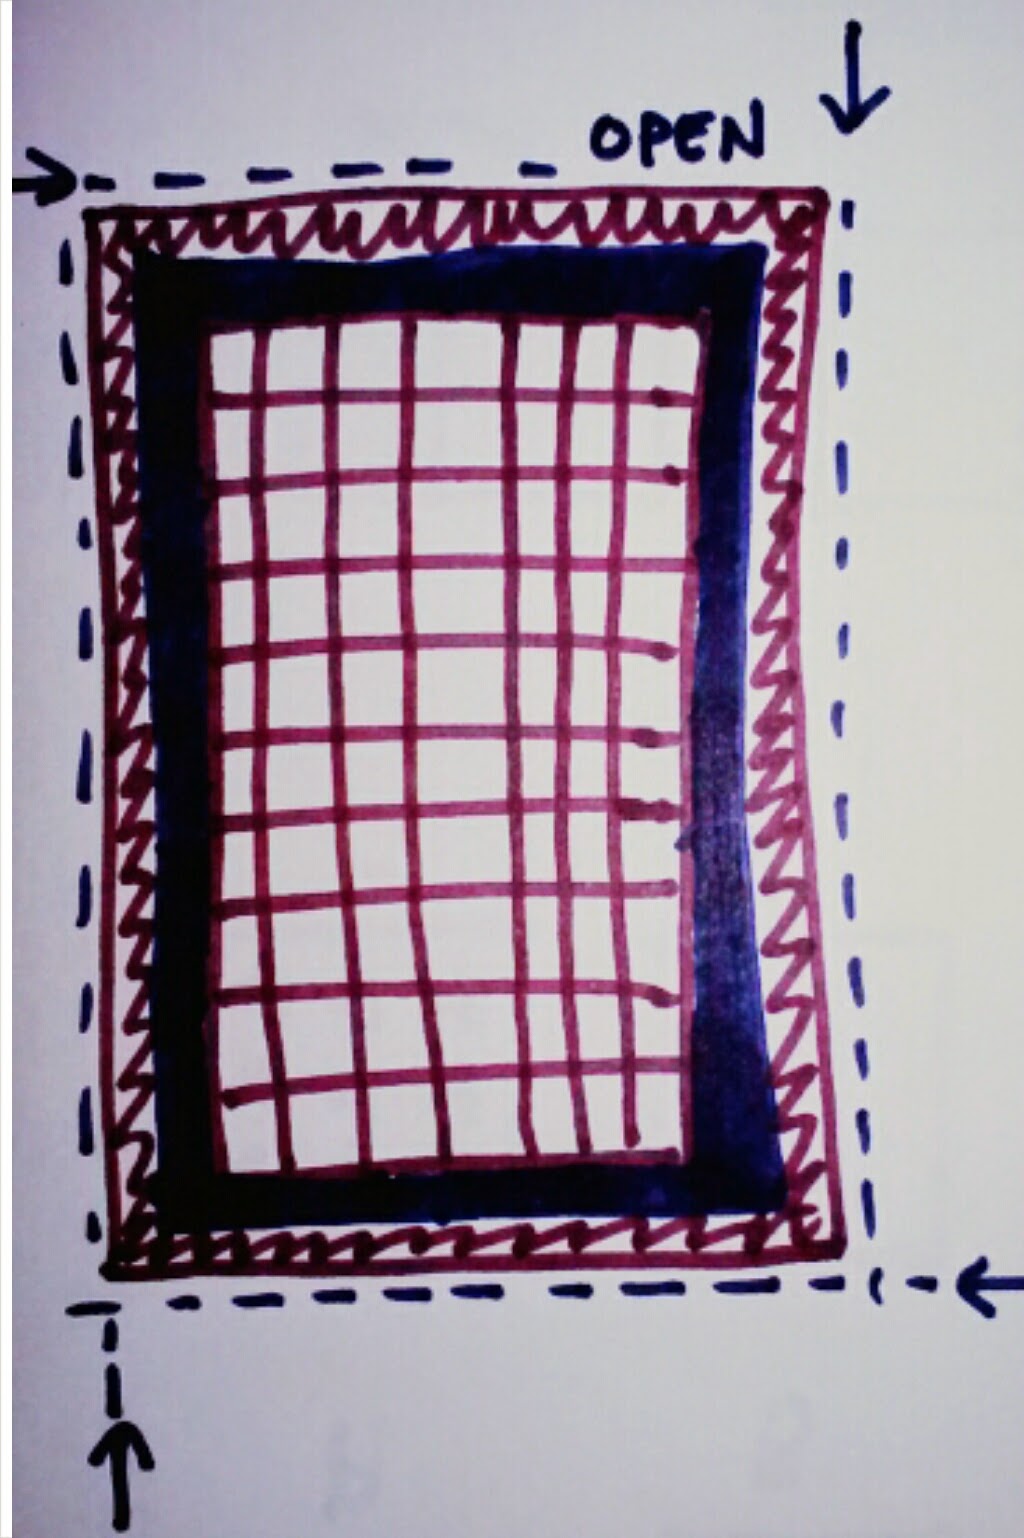
Finished quilt size: Approx. 42- inches x 60- inches

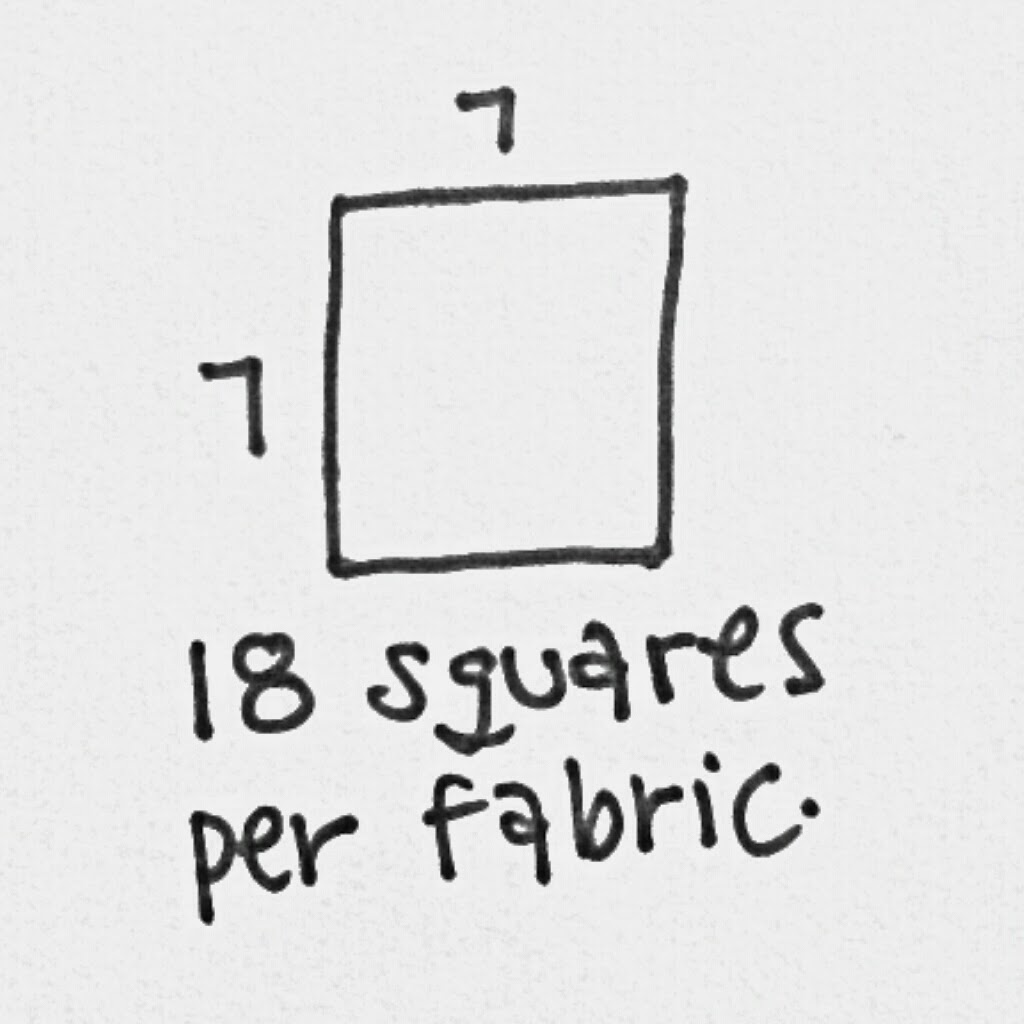
1. Cut each patterned and plain fabric into 7x7-inch squares, you should get about 18 squares per fabric.


2. Put them in stacks by fabric, in the order in which you want them to be in your quilt (should be pattern, plain, pattern, plain). Stack 1 becomes A, stack 2 becomes B, stack 3 becomes C, and stack 4 becomes D.


3. The quilt is 7 columns by 10 rows.

4. Organize rows.

Row 1= A, B, C, D, A, B, C
Row 2= B, C, D, A, B, C, D
Row 3= C, D, A, B, C, D, A
Row 4= D, A, B, C, D, A, B
Row 5= A, B, C, D, A, B, C
Row 6= B, C, D, A, B, C, D
Row 7= C, D, A, B, C, D, A
Row 8= D, A, B, C, D, A, B
Row 9= A, B, C, D, A, B, C
Row10= B, C, D, A, B, C, D

Diagonally, the same fabric should be lined up and if starting at the top left corner, moving to the bottom right corner, you should be able to see a pattern A, B, C, D.


5. Sew row 1 by placing A, and B right sides together and sewing the right side with a 1/2 inch seam. Continue in same way, until you finish sewing all squares of row one together. Pin a numbered paper to the first square, so you remember which row is which, when you go to sew them to the next row. Press the seams. Pinning a number is really helpful, so you don't play a guessing game later.


6. Sew row 1 and row 2 together, by matching the bottom of row 1 and the top of row two. Fold down row 1, so right sides of both rows are touching. If you like to sew using pins, pin what is now the top side and sew together. I used a 1/2-inch seam.


7. Press open the seam.

8. Repeat the steps, until you have sewn all completed rows, together. Giving you a total of 10.

9. Place batting on ground, spread it out.

10. Lay your backing material, right side up. Spread it out, so that the batting is a little bit bigger than your backing material. This means that your wrong side should be laying on top of your batting.

11. Lay your quilt top with the right side down. This means, that you should be looking at the wrong side. Spread it out, so that it lines up with your backing material. If the backing is a bit bigger, that is fine, just make the excess move evenly around the quilt top.

12. Pin all three layers together with pins or saftey pins.

Steps 9, 10, 11, 12

13. Time to sew! Start with a long side, move to a short side, and then the other long side. This leaves you with one short side. Sew this side, but leave an opening, so that you can turn your quilt out. I had an opening of about 10 inches. Trim batting and backing to line up with quilt top.


14. Turn quilt out. Stick a hand in between your quilt top and your backing. Grab the top corner opposite of your opening and pull it through. Then grab the other top corner. You will be needing to pull the fabric through as you move from corner to corner.

15. Once your quilt is turned out, fold fabric of opening inside and pin together, so that that their edges line up with the seam of the quilt. Top stitch this. Reverse at the beginning and end of the stitch.

16. Pull out corners if needed, with a needle. I can never get a perfect square corner.

17. Voila! Lint roll if needed, fold, wrap, and deliver!

I hope you enjoyed my lovely drawings. I thought about using a ruler for about 3 seconds and then decided against it. Ha, ha! I would definitely be appalled if my students tried to turn in work that looked like these!


Monday, July 14, 2014

Baby, Baby, Baby, Oh Baby!

As usual, many people I know are out having babies and being generally happy about life and being married and all of the good stuff, whilst I am still single and alone.

However, this time around, one of my best friends is in the mix and I like to make fun things for my friends... especially when they are having babies!

I originally thought of making my friend a layette, but I decided to just make some burp rags and a quilt. There are so many burp rag tutorials available on pinterest and to be honest, you probably don't even need a tutorial. I thought of just sewing rectangle burp rags, but decided that the one I found from Homemade By Jill would be super cute!

Burp rags are fast and easy to make! The amount of material suggested by Homemade By Jill, allowed me to make 8 burp rags. So, I have four for my best friend (her shower is in 2 weeks) and I gave the other four to my co-worker. She had her baby last week, Sunday, and the rags arrived just before, on Wednesday. Phew!

I chose a super cute fabric with hedgehogs and another one with owls and nature-y stuff, for my tops. I went with one fabric for the backing of all of the burp rags, and that was a lovely neon green polka dot material. I think that they turned out pretty well and if you are looking for something fun to give to a friend who is expecting, I think that these would be a good idea!


Ahh! I am so pleased. These are so cute and turned out really well. I just can't get enough of those hedgehogs!

Sunday, July 13, 2014

Bon Appetit Desserts: Vanilla Chiffon Cake

Wow! I sure did have a tough time gathering some of the ingredients for this recipe. First off, no stores offered whole vanilla beans. I enlisted my friend to purchase some for me at Whole Foods. She lives by the one in Pasadena, but it is an hour from my house. Luckily, I met up with her last weekend, to go and see the Reagan Library, so I was able to pick them up from her. I got two jars... for $20! That is ridiculous! That is only 4 beans! Outrageous!

The next items on my list that I needed to find, were matzo cake meal and potato starch. Stater Brothers generally offers a great selection of 'Bob's Red Mill' products and I thought for sure, that I would be able to find potato starch there. I was wrong! Also, they did not have matzo cake meal. Regular matzo meal, sure, but not cake meal.

I travelled to a health food store a town over, called Clark's. My mom used to take me and my brother there, when we were kids and she was on a tofu kick. Thank goodness it didn't last more than a year! I will never eat tofu again. Tofu roll-ups, tofu ice cream, tofu this, tofu that. I digress.

Clark's had potato starch and every other Bob's Red Mill product that I could ever ask for. They also had the very same vanilla beans that I got, for $8.50! You live and you learn. They however did not have any matzo cake meal.

Due to the fact that I needed this product, I finally had a brilliant idea... beyond trying to purchase it online, from Manischewitz. I contacted Bon Appetit over Facebook and asked them about it. They were quite prompt with their response and said that regular matzo meal would do just fine. Phew! I do know that matzo cake meal is a bit finer than the regular meal, so for this recipe, I blended up the regular meal a bit, before using it.

For your sake, I hope you live near a Jewish market and a health food store!

I have come to the conclusion, that this endeavor is going to be a pretty costly one and that I will have a very well stocked bar cart, by the end of this Bon Appetit process. I have never had alcohol in my house before, and now, I have Brandy, Bailey's, Rum, Reisling... I will soon be needing Amaretto, and Gran Marnier.

Would you care for a drink?

So, here it is!


Vanilla Chiffon Cake

1-1/2 cups sugar, divided
1/2 cup matzo cake meal
1/2 cup potato starch
1-1/2 vanilla beans, chopped
1/2 teaspoon coarse kosher salt
7 large eggs, separated, room temperature
2 Tablespoons vegetable oil
2 Tablespoons brandy


Preheat oven to 350ºF. Blend 1/2 cup sugar, matzo cake meal, potato starch, vanilla beans, and coarse salt in processor until beans are finely chopped. Sift mixture into small bowl; discard beans in sieve.**

Using electric mixer, beat egg whites in large bowl until medium-firm peaks form. Gradually add 3/4 cup sugar, beating until stiff but not dry. Using same beaters, beat egg yolks and remaining 1/4 cup sugar in another bowl until thick, about 5 minutes. Gradually beat in oil, then brandy. Beat in matzo mixture. Fold in egg white mixture in  additions.

Transfer to un-greased 10-inch-diameter angel food cake pan with removable bottom. Bake until tester inserted near center comes out clean, about 37 minutes. Immediately invert center tube of pan over neck of narrow bottle and cool cake completely.

DO AHEAD: Can be made 1 day ahead. Cover cake in pan.

Using sharp knife, cut around sides of pan and center tube to loosen cake. Holding center tube, lift cake from sides. Cut cake free from pan bottom. Turn cake onto plate, Using serrated knife, cut cake into wedges.

**Do not waste time blending the matzo meal, potato starch, etc. My vanilla beans did not chop up. So, I suggest that you just split your beans and scrape out all of the vanilla and then mix that in with the matzo mixture. A good old whisk will do the trick. Do sift afterward, though.**

I had to use an old school hand beater for the egg yolks and let us just say that I got quite the work out! This cake comes together in no time at all. It also has an extremely short bake time. The result? A cake that is as light as air! In fact, I am changing the name to 'Light as Air Cake'. Have fun baking!

Saturday, July 12, 2014

Chocolate Doughnut Cake

From August to May, I am a high school art teacher. By the end of May, I am generally starting my summer break. However, this year, I took a job at a local Christian camp and I am working in the craft cabin. One must do what they can, to make ends meet. I just hope that I have enough energy, for the new school year, which starts in less than a month!  Ahh!

Even though I have been working, my schedule allows be to get some baking in. As you know, I have been making my way through Bon Appetit's Dessert cook book. I will be delivering a new recipe for that, tomorrow.

Right now, I wanted to share a recipe for 'Chocolate Doughnut Cake', by Willow Bird Baking.


I came across this recipe a month or so ago and I have been dying to make it, but I did not have a cast iron skillet, even though I have wanted one for ages. I finally picked one up and decided to make this cake straight away. This recipe is very easy to make and you probably have all of the ingredients on hand.

It has been nearly 100ºF at my house and it was no different today!  So, with that heat and then the heat of the oven, my frosting was a bit runny. I suggest letting your skillet/cake cool down completely before you put the frosting on and if your frosting is a bit on the runny side, I suggest adding more confectioner's sugar. I wish I had thought of this before I put the frosting on my cake.

With a fast baking time, you will be enjoying this cake within one hour!

Enjoy!


Sunday, July 6, 2014

Bon Appetit Desserts: On Hold

This week, there is no recipe, because I am having a hard time finding matzo cake meal and potato starch.  I am going to check the health food store and if they don't have these items, I just don't know what I will do!

Not to worry, I will figure this out and will be back to baking in no time... posting the recipe for your use.

Have a wonderful week!

Tiffiny