I recently discovered the blog, 'The House That Lars Built' and that blog lead me to 'Studio DIY'. One of Studio DIY's last posts was actually written by the gal at 'The House That Lars Built'. Wild, right?! Anyway, Thanksgiving hats were featured on the blog and they were so cute, that I had to make them. Luckily, the school that I teach at has an annual Thanksgiving feast, before we all head off for our short holiday break. I decided that my family class would make these and sport them at the feast, as head pieces and boutonnieres.
We finished all of the pie accessories up yesterday. At first, I was curious as to how one makes the form of a triangle, because the directions on Studio DIY were a bit vague. I looked around Pinterest and came across DIY Individual Pie Slice Box by The Proper Pinwheel. A template is provided. I printed this template out and it was so small. I find it hard to believe that a piece of pie can actually fit inside of it, unless it is enlarged. However, the small size was perfect for my class craft.
The great thing about this craft, is that it is so easy to make... and all you need is paper, glue, scissors, and some ribbon!
If you would like to make these, yourself, I suggest that you use the Proper Pinwheel template combined with the directions on Studio DIY. I love the idea of making holiday hats with family and then wearing them all day. It seems like so much fun!
Go and create! Good luck!
Showing posts with label DIY. Show all posts
Tuesday, November 25, 2014
Sunday, November 23, 2014
Artsy Craftsy Time
I have always wanted to go to a Paint Nite. You know, the ones, where you go to a bar or restaurant and you paint a painting in one night?! Many times, I have asked friends to go with me and they say yes, but when it comes down to brass tacks, they don't end up going. So, I decided to hold my own paint night at my apartment.
Not only did I invite friends over to paint, but I disguised it all as a 30th birthday party. I purchased the pattern, the transfer paper, and the paintbrushes from the website Social Artworking. They give you a list of the paint colors that you need and instead of buying those from the website, I went to Michael's and picked up similar colors. Consumer Crafts was having a nice sale at the time, so I got my 16x20 canvases and all of the easels from them.
The instructions state that it should have taken 3 hours to complete this painting project. Well, the faster ones in the group finished in 5 hours and the slower more particular friends needed 6 hours. I am sure that my friends didn't actually plan on spending the entire day with me, but that is the way that it turned out. We had fun! We listened to music, we ate food, we had good laughs and conversation. It was a great time!!
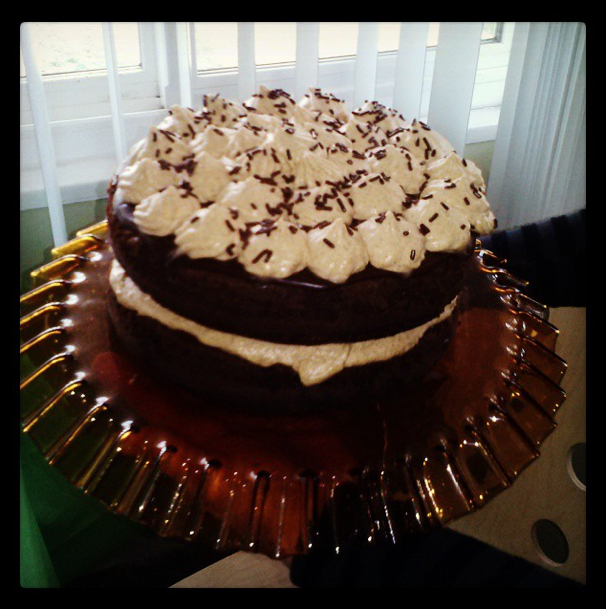
What was the food, you ask? Just snacks, essentially. I served Hashimoto Pasta Salad, because it is so good and it has turned out to be a great crowd pleaser. I also made a Chocolate Pumpkin Cake with a Milk Chocolate Ganache and Pumpkin Whipped Cream. For drinks, I made cranberry spritzers. I used Cran-Cherry juice mixed with some Schweppes original sparkling spritzer water. Super easy and delicious! I also served cold and hot tea, as well as water. This party came together easily and it was very enjoyable to me, to have a small group of my best friends partaking in an activity that I enjoy.
Here are some photos!
Not only did I invite friends over to paint, but I disguised it all as a 30th birthday party. I purchased the pattern, the transfer paper, and the paintbrushes from the website Social Artworking. They give you a list of the paint colors that you need and instead of buying those from the website, I went to Michael's and picked up similar colors. Consumer Crafts was having a nice sale at the time, so I got my 16x20 canvases and all of the easels from them.
The instructions state that it should have taken 3 hours to complete this painting project. Well, the faster ones in the group finished in 5 hours and the slower more particular friends needed 6 hours. I am sure that my friends didn't actually plan on spending the entire day with me, but that is the way that it turned out. We had fun! We listened to music, we ate food, we had good laughs and conversation. It was a great time!!
What was the food, you ask? Just snacks, essentially. I served Hashimoto Pasta Salad, because it is so good and it has turned out to be a great crowd pleaser. I also made a Chocolate Pumpkin Cake with a Milk Chocolate Ganache and Pumpkin Whipped Cream. For drinks, I made cranberry spritzers. I used Cran-Cherry juice mixed with some Schweppes original sparkling spritzer water. Super easy and delicious! I also served cold and hot tea, as well as water. This party came together easily and it was very enjoyable to me, to have a small group of my best friends partaking in an activity that I enjoy.
Here are some photos!
We all followed the same directions, and each painting turned out so differently! I think that that is my favorite part. Unique and fun just like all of us!
The cake! It was soooo good! And a quick and easy recipe, too. #FairTrade cocoa from Equal Exchange.
That's all she wrote, folks! Have a great week!
Tuesday, July 15, 2014
Easy Peasy Quilt Tutorial
I am a quilter... or rather I make blankets, because I don't actually do the quilt top. I don't have the money to buy one of those machines, nor do I have the money to pay someone to do it for me. But, if you will, please go along with me, I am a quilter.
I have made many a quilt in my nearly 30 years of life and I am always so excited to give them away. People enjoy receiving quilts, but I think that they would enjoy them a lot more if they truly understood all of the work that goes into making one. I mean cutting the pieces! Piecing the top! Oh, The ironing! Ahh!
I typically make this quilt in one day, from cutting, to wrapping it up in gift paper. However, this time around, I allowed myself to cut on one day, sew the top on another day, and then I put all of the layers together on a third and final day. I have made this particular quilt many times for babies and military personnel.
Once you give this quilt a try, it will be your go to quick quilt. My mom got this quilt from a magazine, back when I was in high school, so at least 15 years ago. She used it to make me a Veggie Tales quilt. It is still one of my favorites!
I was at JoAnn's Fabric for something completely different, when I saw the zig-zag and bird material and knew that they would be the perfect combinations, for the quilt I wanted to make for my best friend's baby (due in early September!). They other colors were easy to pair as well.
2. Put them in stacks by fabric, in the order in which you want them to be in your quilt (should be pattern, plain, pattern, plain). Stack 1 becomes A, stack 2 becomes B, stack 3 becomes C, and stack 4 becomes D.
I hope you enjoyed my lovely drawings. I thought about using a ruler for about 3 seconds and then decided against it. Ha, ha! I would definitely be appalled if my students tried to turn in work that looked like these!
I have made many a quilt in my nearly 30 years of life and I am always so excited to give them away. People enjoy receiving quilts, but I think that they would enjoy them a lot more if they truly understood all of the work that goes into making one. I mean cutting the pieces! Piecing the top! Oh, The ironing! Ahh!
I typically make this quilt in one day, from cutting, to wrapping it up in gift paper. However, this time around, I allowed myself to cut on one day, sew the top on another day, and then I put all of the layers together on a third and final day. I have made this particular quilt many times for babies and military personnel.
Once you give this quilt a try, it will be your go to quick quilt. My mom got this quilt from a magazine, back when I was in high school, so at least 15 years ago. She used it to make me a Veggie Tales quilt. It is still one of my favorites!
I was at JoAnn's Fabric for something completely different, when I saw the zig-zag and bird material and knew that they would be the perfect combinations, for the quilt I wanted to make for my best friend's baby (due in early September!). They other colors were easy to pair as well.
The completed quilt.
A close-up of the materials used.
Generally, something ends up wonky in my quilts, but for the first time ever, the squares all lined up! This made me extremely happy!
If you would like to make this quilt yourself, here is what you will need:
2 patterned fabrics- 5/8 yard for each fabric
2 plain fabrics- 5/8 yard for each fabric
1- 3/4 yard fabric for backing (45 inches wide, if you can)
Batting (a little bigger than finished size)
Thread that matches fabric
Finished quilt size: Approx. 42- inches x 60- inches
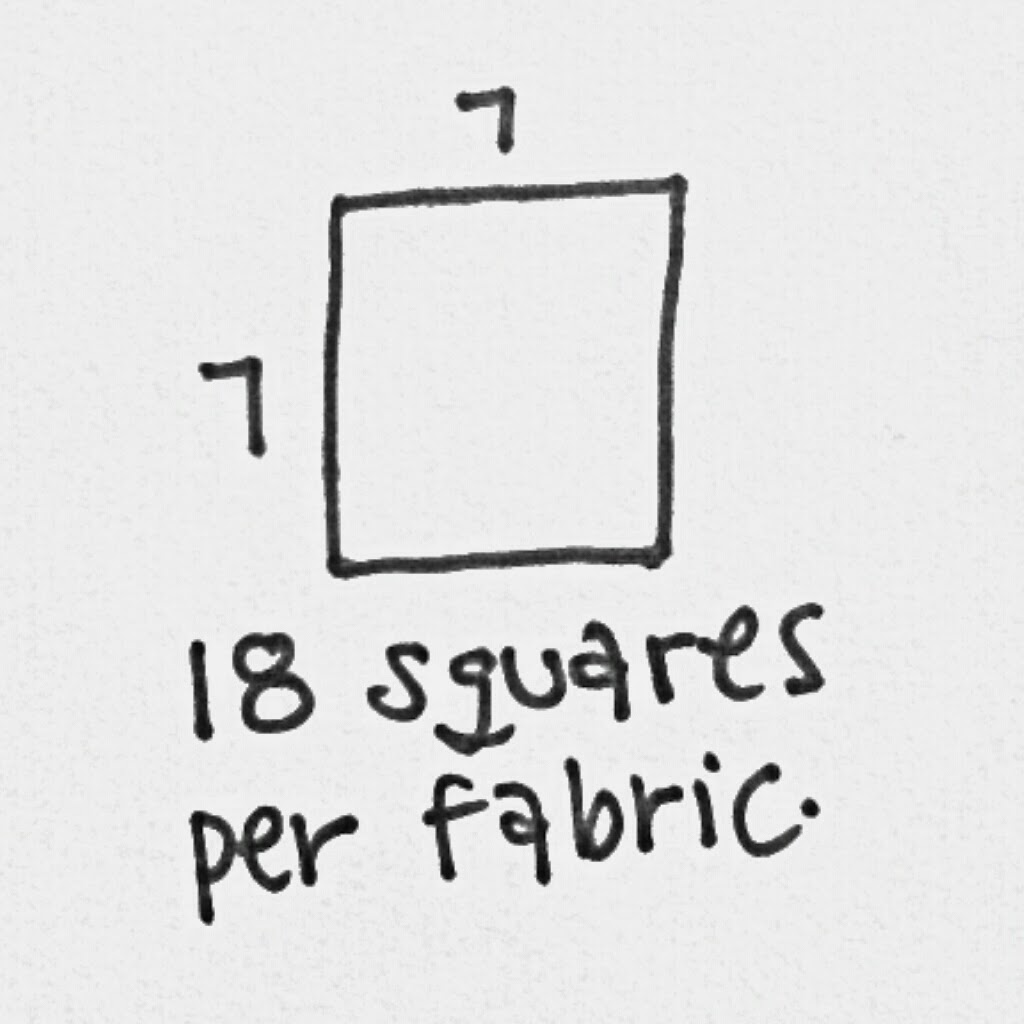
1. Cut each patterned and plain fabric into 7x7-inch squares, you should get about 18 squares per fabric.
3. The quilt is 7 columns by 10 rows.
4. Organize rows.
Row 1= A, B, C, D, A, B, C
Row 2= B, C, D, A, B, C, D
Row 3= C, D, A, B, C, D, A
Row 4= D, A, B, C, D, A, B
Row 5= A, B, C, D, A, B, C
Row 6= B, C, D, A, B, C, D
Row 7= C, D, A, B, C, D, A
Row 8= D, A, B, C, D, A, B
Row 9= A, B, C, D, A, B, C
Row10= B, C, D, A, B, C, D
Diagonally, the same fabric should be lined up and if starting at the top left corner, moving to the bottom right corner, you should be able to see a pattern A, B, C, D.
5. Sew row 1 by placing A, and B right sides together and sewing the right side with a 1/2 inch seam. Continue in same way, until you finish sewing all squares of row one together. Pin a numbered paper to the first square, so you remember which row is which, when you go to sew them to the next row. Press the seams. Pinning a number is really helpful, so you don't play a guessing game later.
6. Sew row 1 and row 2 together, by matching the bottom of row 1 and the top of row two. Fold down row 1, so right sides of both rows are touching. If you like to sew using pins, pin what is now the top side and sew together. I used a 1/2-inch seam.
7. Press open the seam.
8. Repeat the steps, until you have sewn all completed rows, together. Giving you a total of 10.
9. Place batting on ground, spread it out.
10. Lay your backing material, right side up. Spread it out, so that the batting is a little bit bigger than your backing material. This means that your wrong side should be laying on top of your batting.
11. Lay your quilt top with the right side down. This means, that you should be looking at the wrong side. Spread it out, so that it lines up with your backing material. If the backing is a bit bigger, that is fine, just make the excess move evenly around the quilt top.
12. Pin all three layers together with pins or saftey pins.
Steps 9, 10, 11, 12
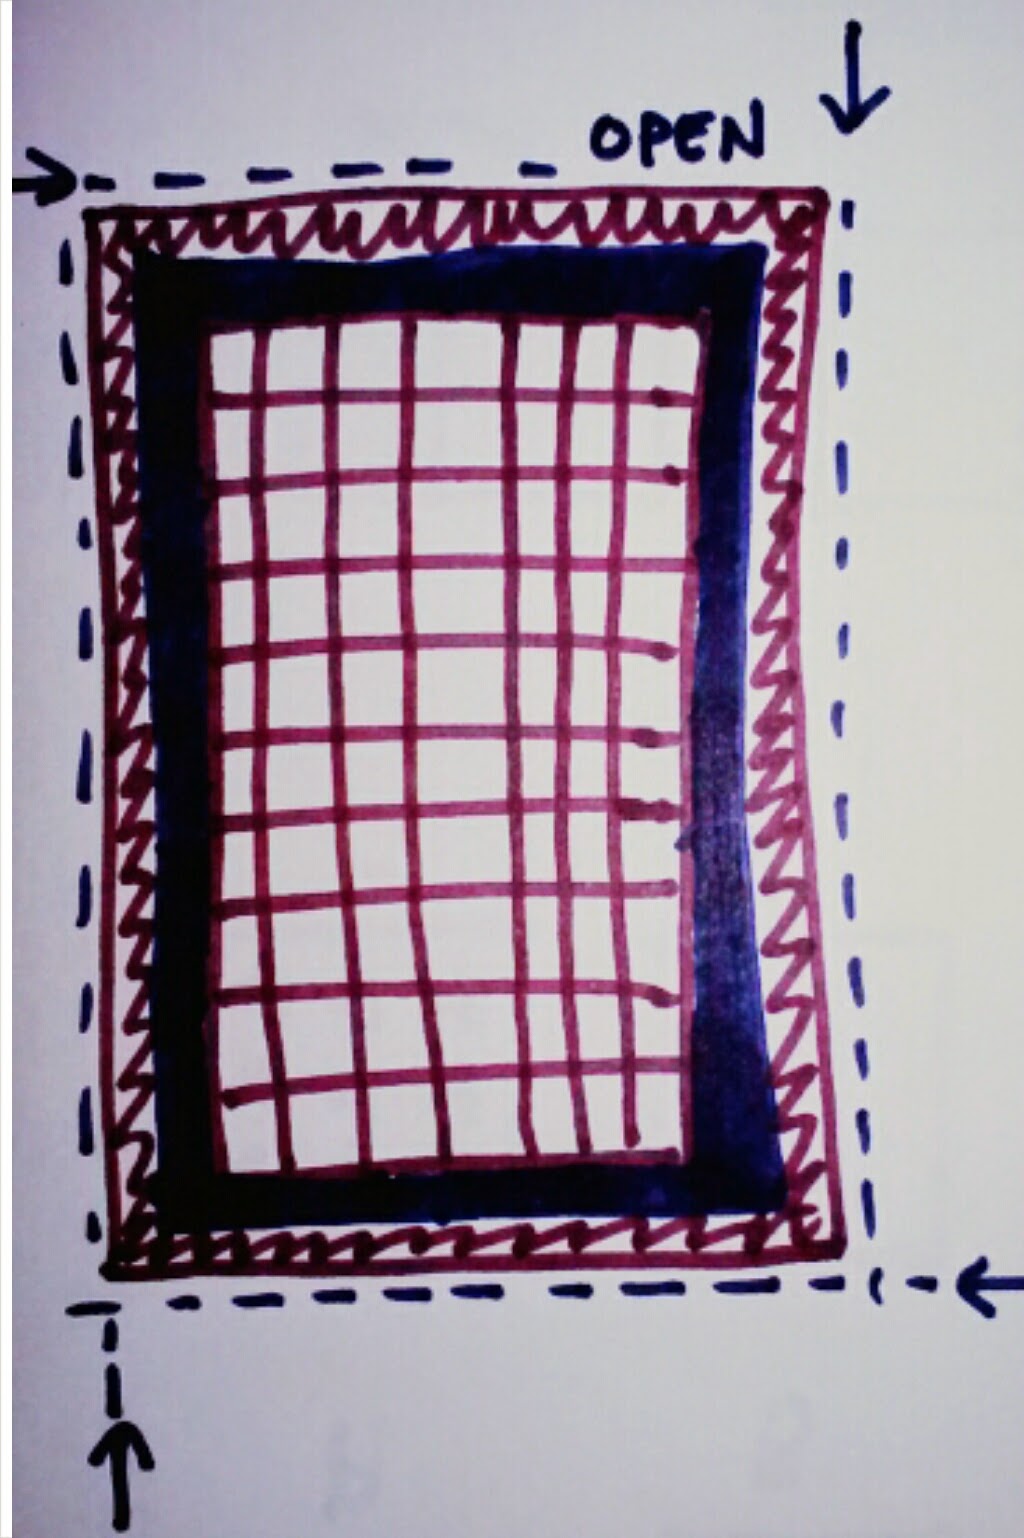
13. Time to sew! Start with a long side, move to a short side, and then the other long side. This leaves you with one short side. Sew this side, but leave an opening, so that you can turn your quilt out. I had an opening of about 10 inches. Trim batting and backing to line up with quilt top.
14. Turn quilt out. Stick a hand in between your quilt top and your backing. Grab the top corner opposite of your opening and pull it through. Then grab the other top corner. You will be needing to pull the fabric through as you move from corner to corner.
15. Once your quilt is turned out, fold fabric of opening inside and pin together, so that that their edges line up with the seam of the quilt. Top stitch this. Reverse at the beginning and end of the stitch.
16. Pull out corners if needed, with a needle. I can never get a perfect square corner.
17. Voila! Lint roll if needed, fold, wrap, and deliver!
I hope you enjoyed my lovely drawings. I thought about using a ruler for about 3 seconds and then decided against it. Ha, ha! I would definitely be appalled if my students tried to turn in work that looked like these!
Monday, July 14, 2014
Baby, Baby, Baby, Oh Baby!
As usual, many people I know are out having babies and being generally happy about life and being married and all of the good stuff, whilst I am still single and alone.
However, this time around, one of my best friends is in the mix and I like to make fun things for my friends... especially when they are having babies!
I originally thought of making my friend a layette, but I decided to just make some burp rags and a quilt. There are so many burp rag tutorials available on pinterest and to be honest, you probably don't even need a tutorial. I thought of just sewing rectangle burp rags, but decided that the one I found from Homemade By Jill would be super cute!
Burp rags are fast and easy to make! The amount of material suggested by Homemade By Jill, allowed me to make 8 burp rags. So, I have four for my best friend (her shower is in 2 weeks) and I gave the other four to my co-worker. She had her baby last week, Sunday, and the rags arrived just before, on Wednesday. Phew!
I chose a super cute fabric with hedgehogs and another one with owls and nature-y stuff, for my tops. I went with one fabric for the backing of all of the burp rags, and that was a lovely neon green polka dot material. I think that they turned out pretty well and if you are looking for something fun to give to a friend who is expecting, I think that these would be a good idea!
However, this time around, one of my best friends is in the mix and I like to make fun things for my friends... especially when they are having babies!
I originally thought of making my friend a layette, but I decided to just make some burp rags and a quilt. There are so many burp rag tutorials available on pinterest and to be honest, you probably don't even need a tutorial. I thought of just sewing rectangle burp rags, but decided that the one I found from Homemade By Jill would be super cute!
Burp rags are fast and easy to make! The amount of material suggested by Homemade By Jill, allowed me to make 8 burp rags. So, I have four for my best friend (her shower is in 2 weeks) and I gave the other four to my co-worker. She had her baby last week, Sunday, and the rags arrived just before, on Wednesday. Phew!
I chose a super cute fabric with hedgehogs and another one with owls and nature-y stuff, for my tops. I went with one fabric for the backing of all of the burp rags, and that was a lovely neon green polka dot material. I think that they turned out pretty well and if you are looking for something fun to give to a friend who is expecting, I think that these would be a good idea!
Ahh! I am so pleased. These are so cute and turned out really well. I just can't get enough of those hedgehogs!
Monday, June 16, 2014
Old Light = Fancy Planter
Yesterday was Father's Day and my mom and I went to my gramps' house and took him out to breakfast. Afterward, we went back to his house and we helped him with things around the house. This included me changing a light and shattering the new bulb on the ground. Hooray! My gramps did not want the old cover on the light anymore, so I asked him if I could have it.
I had a great idea in my head when I first saw it. I just knew that it would make a great planter for a succulent or a cactus. I had some left over gold spray paint from a project that I did for my school. Things were coming together!
Here is what the cover looked like before, cleaned up and painted:
I decided to go with some ivy instead of a cactus, because they need good drainage and this light has no holes on the bottom.
Here are four easy steps to making this yourself:
1. Find old light cover
2. Wash/ dry it
3. Spray paint it any old color you would like
4. Put a plant in it!
So simple, and cute!
*Both photos taken by me: Tiffiny H.*
I had a great idea in my head when I first saw it. I just knew that it would make a great planter for a succulent or a cactus. I had some left over gold spray paint from a project that I did for my school. Things were coming together!
Here is what the cover looked like before, cleaned up and painted:
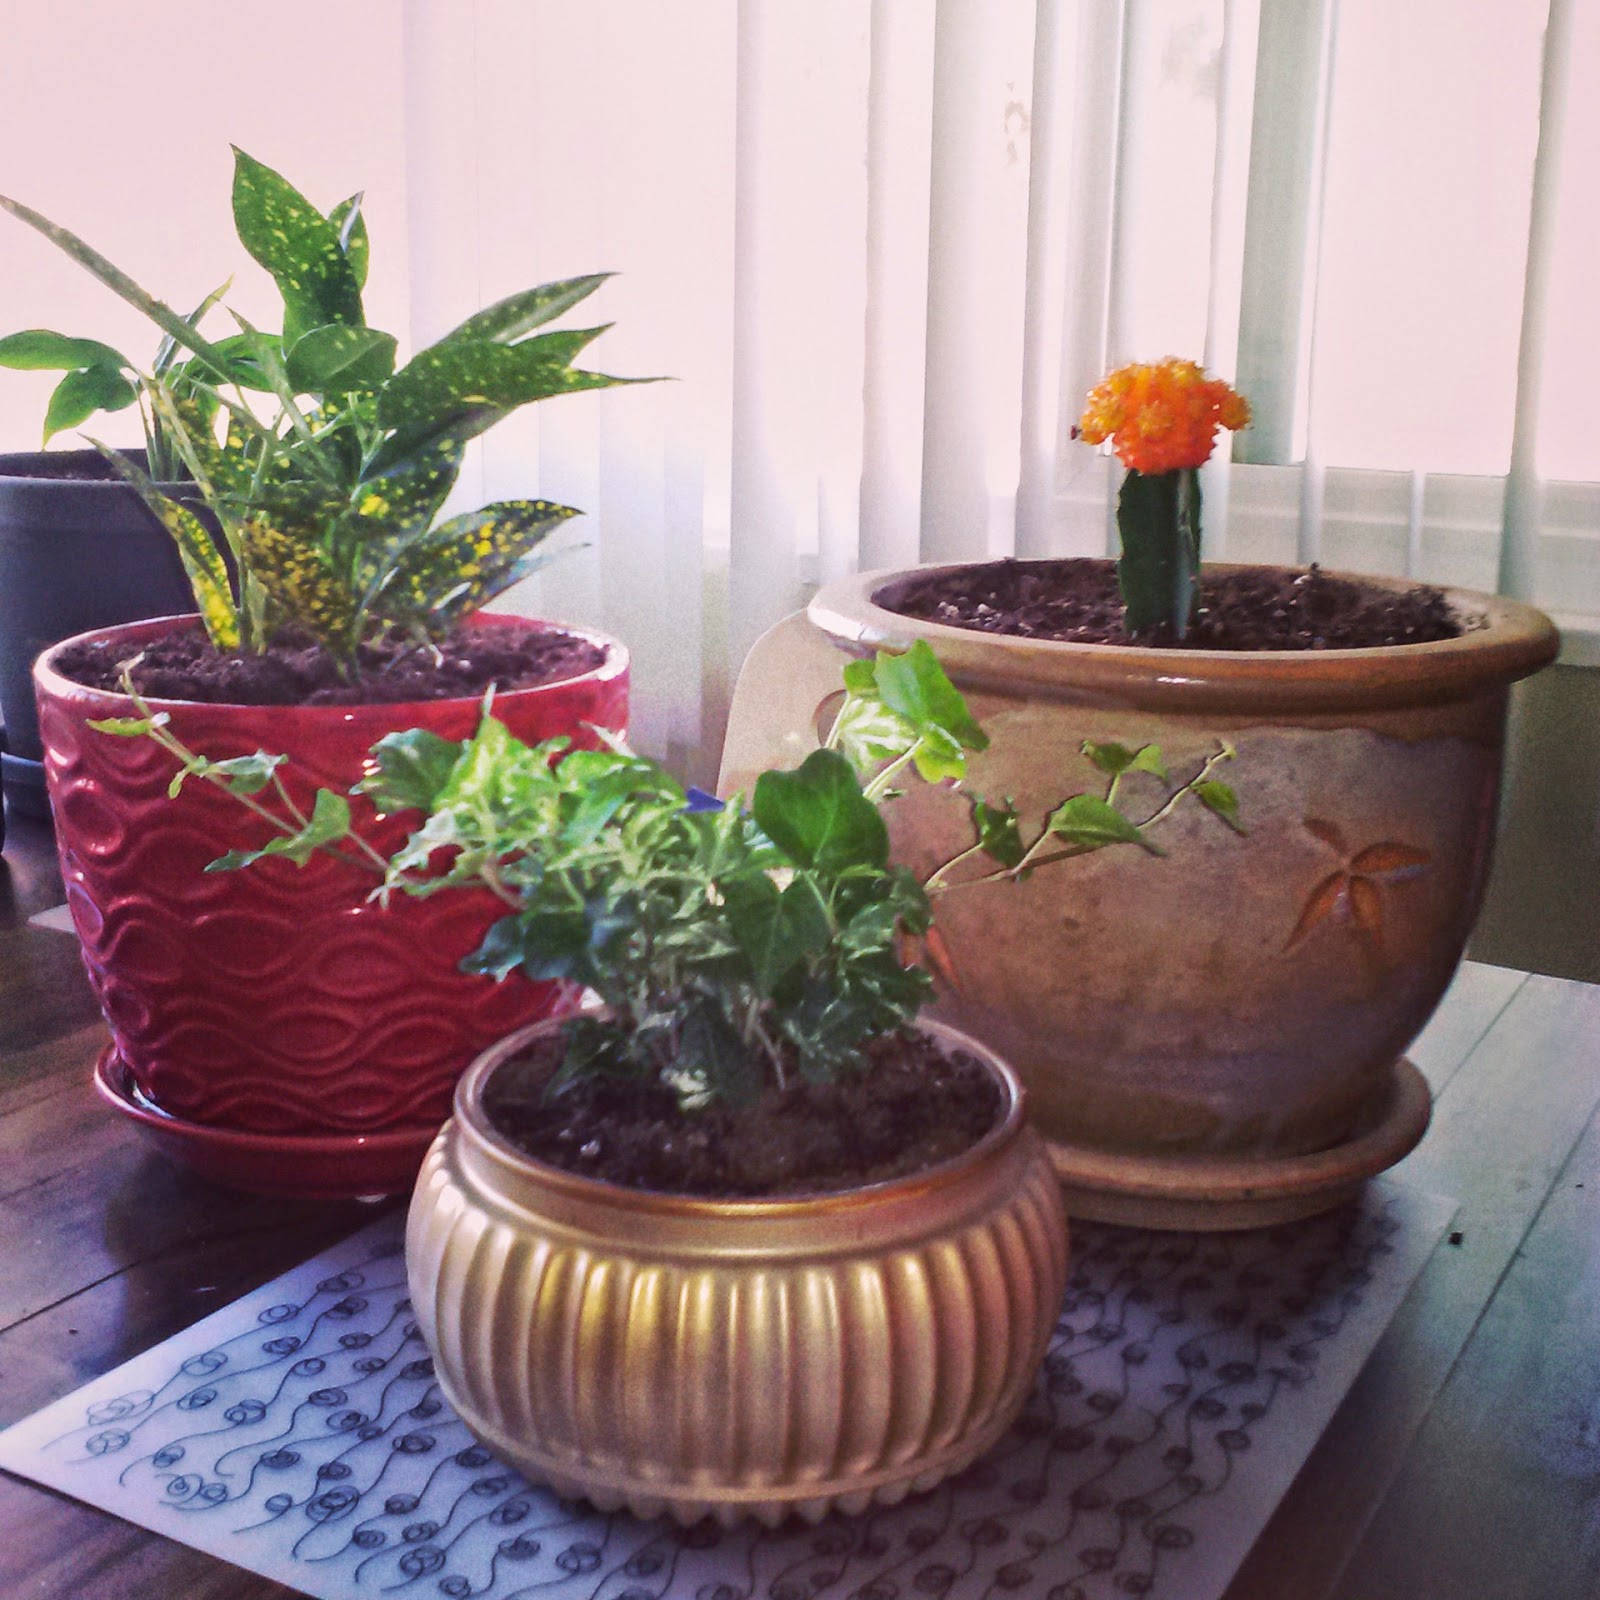
Here it is with a new plant and some plant friends:
I decided to go with some ivy instead of a cactus, because they need good drainage and this light has no holes on the bottom.
Here are four easy steps to making this yourself:
1. Find old light cover
2. Wash/ dry it
3. Spray paint it any old color you would like
4. Put a plant in it!
So simple, and cute!
*Both photos taken by me: Tiffiny H.*
Subscribe to:
Posts (Atom)